Hi guys,
Dear oxford plus website guys…
Welcome to a C# ProTip, Figure 1.

Figure 1. Logo for C # ProTips!!!
I want to show you, in this oxford plus protip, how we can make an ASP.Net custom server control that it has embedded images inside.
Well, for start, and of course for saving time, here (Figure 2) we have an existing custom server control…
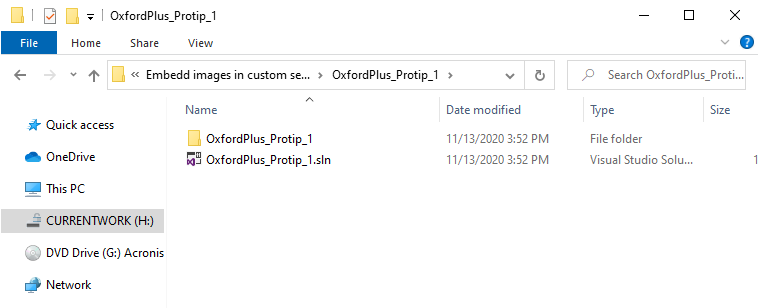
Figure 2.
As you see here (Figure 3), inside its folder, we call project name as well, solution name, as “OxfordPlus_Protip_1”.

Figure 3.
And also, as you can see here (Figure 4), I name the class of control, as “MyFatControl”. Fat … because it is supposed to have a lot of things inside itself …

Figure 4.
Indeed we are going to embed three pictures…. this one’s (Figure 5)…. inside this control as embedded resources.

Figure 5.
When we have a server control with embedded resources, we no longer see any additional files beside of the control’s DLL file.
All embedded resource files, include jpeg or png picture files, Javascript’s .js files, css files and so on, will really merged in control’s dll file. Indeed, finally, we will have one .dll file, of course a fat dll file…
Well, but first of all, let me to introduce this control. I already have used this control, I mean oxfordPlus_Protip_1 control, inside this website (Figure 6)…

Figure 6.
As you can see, this control has such a state, shows two numbers and asks us to enter the sum of them.
So I enter a correct answer first, as we see (Figure 7), it announces that my answer is correct.
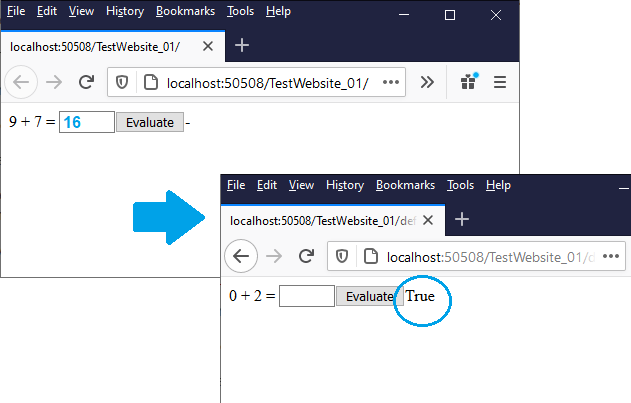
Figure 7.
But if we enter a wrong answer, like this (Figure 8). The control again shows the proportional reaction.
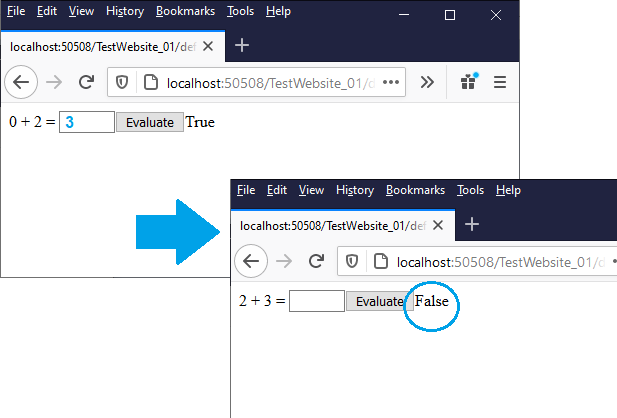
Figure 8.
Well, now we want to use these images as embedded resources so that control displays for example this image (Figure 9) instead of the phrase True, or this one (Figure 10) instead of phrase False, and so on …
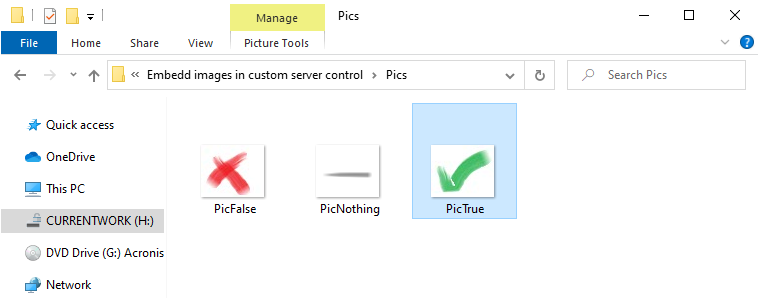
Figure 9.
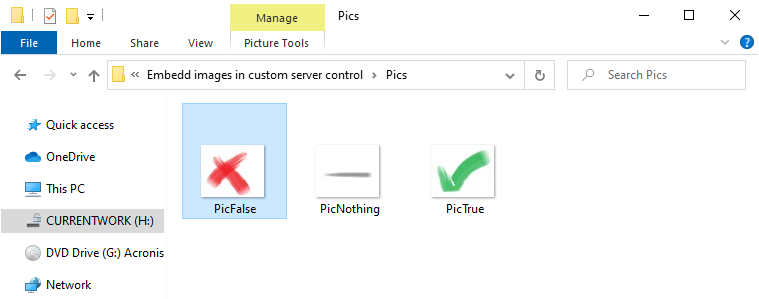
Figure 10.
The work process is not very complicated. The first thing we need to do is create a new folder inside the control to place images.
So first, I open the control in Visual Studio, and in solution explorer, I create a folder and I name it as Images. Then I copy and paste images into that folder (Figure 11).
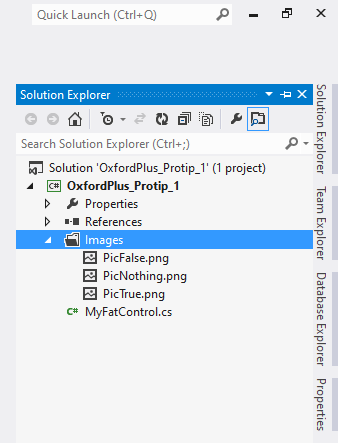
Figure 11.
The next task is that Right-click on any of these images and go to the properties section.
Here you have to change this property to Embedded Resource (Figure 12). I repeat the same for the others. Well, now our images will be considered as embedded resources and will be saved inside the DLL file when it compiles.
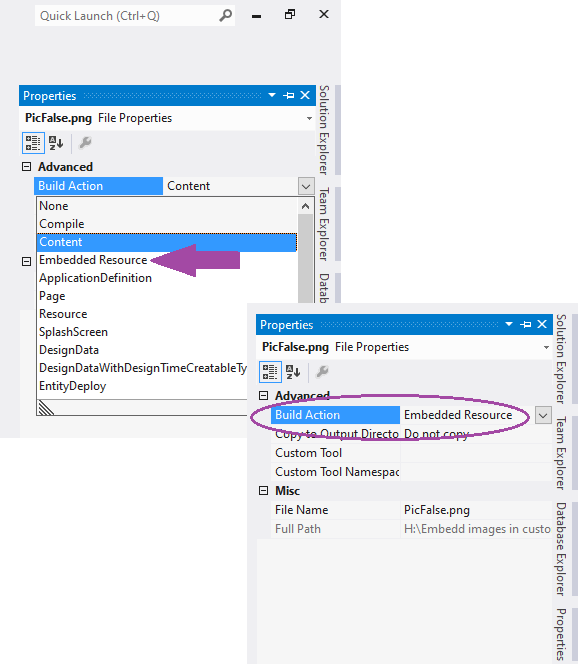
Figure 12.
But in order to really see the images in the output, we need to change the program code as well.
So I bring the class code, and where necessary, I change the code.
For example, here (Figure 13), as you can see, we have used a label named lblResult to display the result.
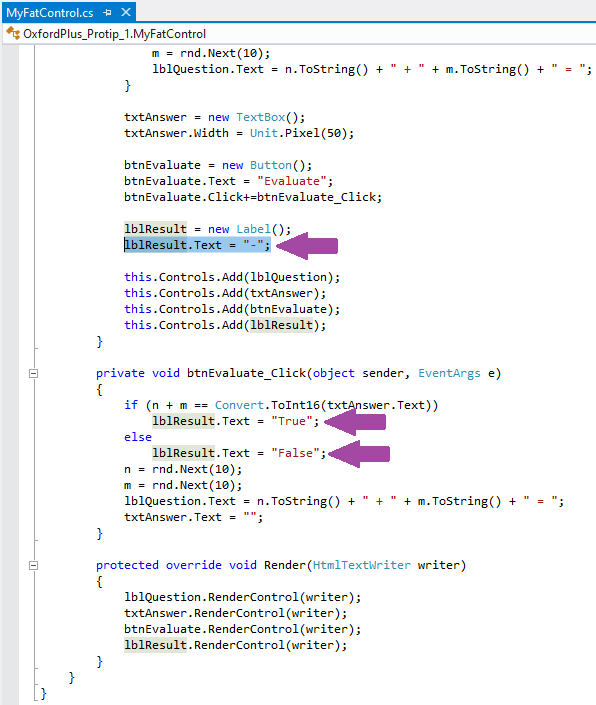
Figure 13.
I delete it and use an image control instead. Now as the default image, I write this code here (Figure 14):
Page.ClientScript.GetWebResourceUrl();
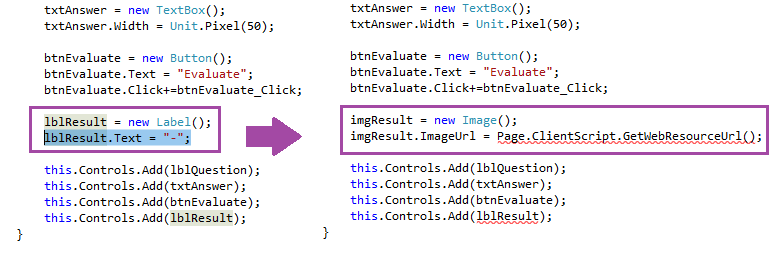
Figure 14.
And here (Figure 15), I write
this.GetType()
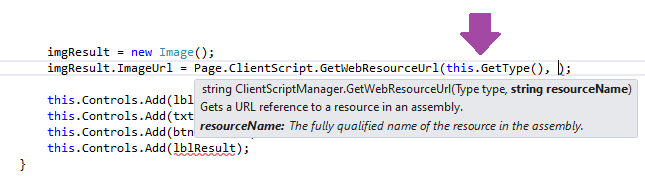
Figure 15.
and here we need to specify the path of the embedded image this way:
project name dot folder name dot image file name
Since this is the name of my project (Figure 16), so I write OxfordPlus_Protip_1 instead of project name
And
My folder name is Images
And finally the name of the image file that I want to be displayed here is PicNothing.png
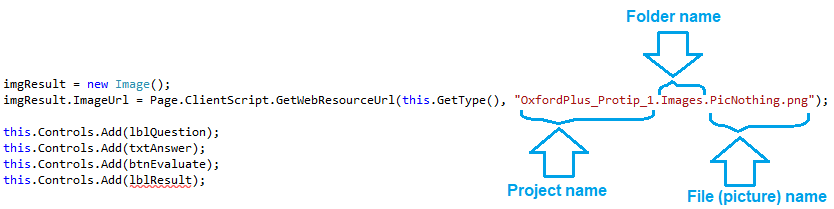
Figure 16.
And here (Figure 17), we have to add the new control instead of the previous one

Figure 17.
This is (Figure 18) where we need to show the True and False images
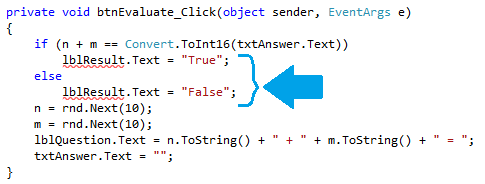
Figure 18.
So I can easily copy this line of code (Figure 16 -> Line 2) and replace it with this code and this one (Figure 19 -> Lines 4 and 6)
We just need to correct the file names
And correct this (Figure 19 -> Variable names)
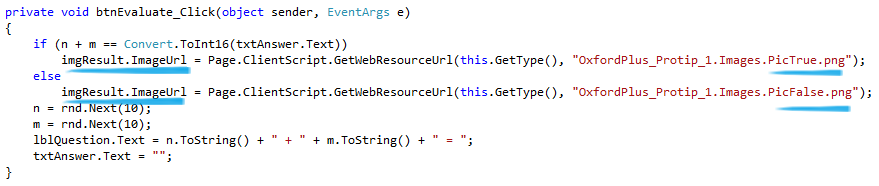
Figure 19.
I do not intend to talk too much about the details of the server custom controls in this ProTip
Because I have already published an independent course in this field on the website (It's link)
So without further description, let's move on to compiling the control
After compiling the control, I add it to the website
And I run it (Figure 20)
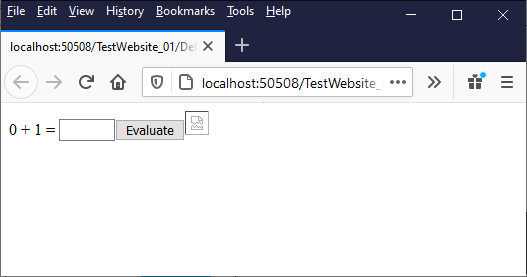
Figure 20.
Well, the image was not displayed
But why
Yes, I'm sorry. I forgot to do another thing
We should have come here before, in properties folder (Figure 21 -> Red arrow), and in this class file AssemblyInfo.cs (Figure 21 -> Green arrow)
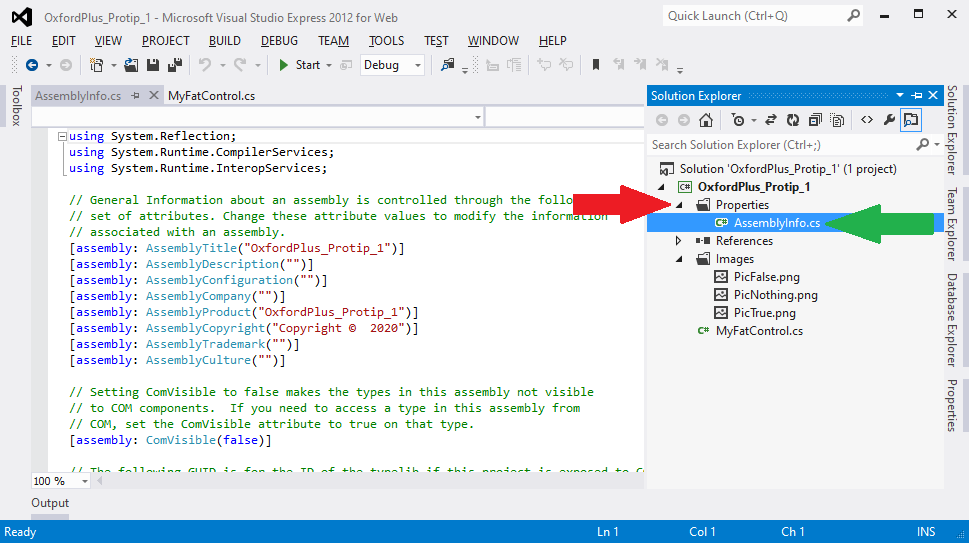
Figure 21.
We needed to add these codes (Figure 22)
[assembly: System.Web.UI.WebResource("OxfordPlus_Protip_1.Images.PicNothing.png", "img/png")]
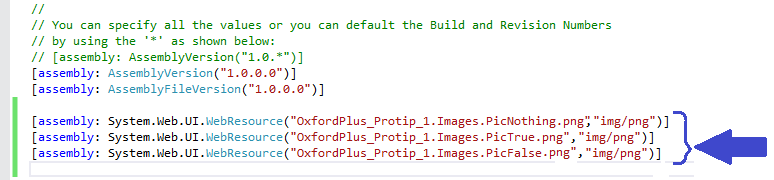
Figure 22.
Here is the file path (Figure 23)

Figure 23.
We have to write a line of code for each image
Well, we recompile the control
And we add it back to the website, It should work now,
yes it works (Figure 24)
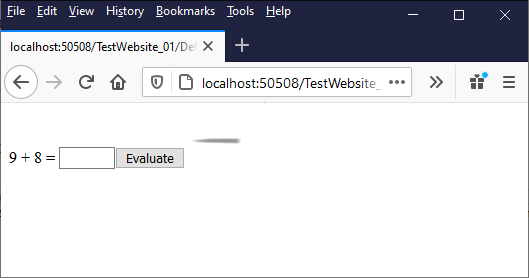
Figure 24.
By adding another line of code (Figure 25), we may get even better results

Figure 25.
not bad (Figure 26)
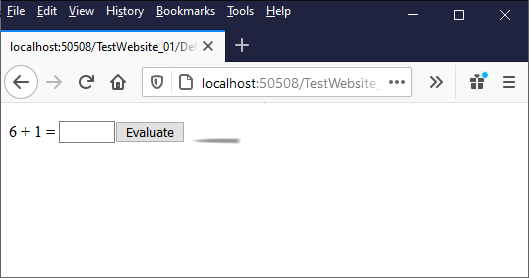
Figure 26.
Let me enter a number
Yes, it works well (Figure 27)
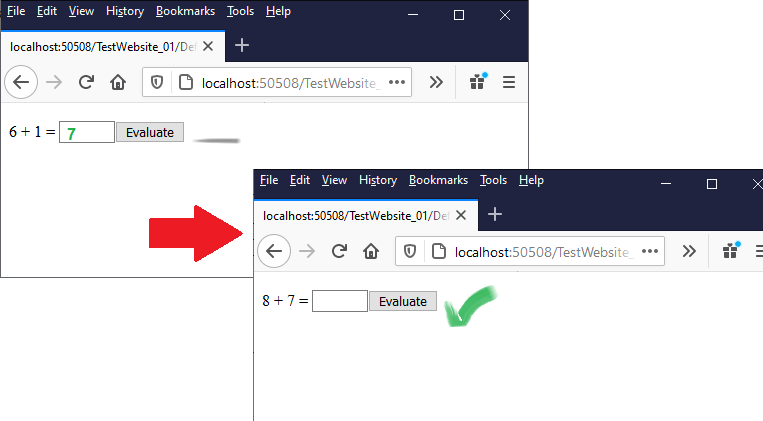
Figure 27.
And if we give a wrong answer (Figure 28)
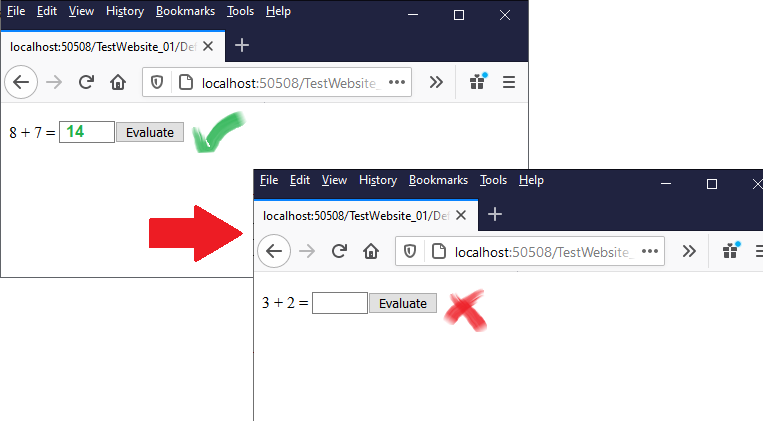
Figure 28.
You can download the source code used in this ProTip from the link below:
Embedd_images_in_custom_server_control.rar
Good luck
Oxford Plus Website Manager
Written by: Abdolreza GhanbariError #456
Views count: 305
This page has updated in
- 31 January 2021
- 30 January 2021